How movement can be articulated for the purposes of design? – Final Essay – Re_exam

The aim of this essay is to discuss the methods for describing and analysing movements that Loke and the colleagues (2005, 2010), introduce in their papers. In addition, it will analyse if and how they are useful when it comes to designing new movements within the field of technology. In order to analyse the above-mentioned matters, this essay will compare them with the experience gained from a design project. This design project was part of a university course, whose objective was to explore different movements and their experiences while working with machine learning.

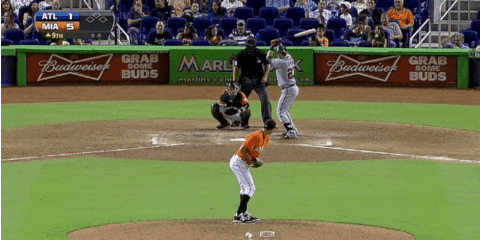
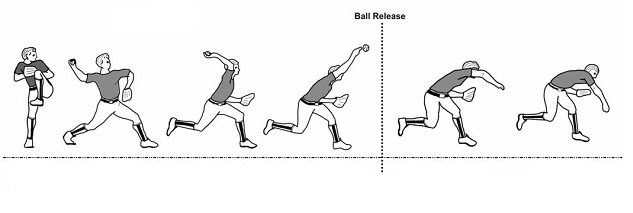
We experience the world with our bodies. They allow us to interact with objects around us, through movements. For a while, movements and gestures has been used within technology to create better interactivity. This can make the interaction more intuitive and natural. For example, we can take the finger gestures used on our smartphones, swiping, typing and so forth. In their paper Loke & Robertson (2010) explain how the interactive technologies that are becoming more embedded in our daily lives, are movement-based, which leads them to be more sought after. Consequently, designers try to design new movements for those technologies. Those new movements should be described or analysed after they are created, because it can inspire and make the designing process more fun as presented later. Loke and the colleagues (2005, 2010) present two ways movement-based interaction can be worked with through describing the movement itself. The first method is through three perspectives: “The mover”, “The observer” and “The machine”. The second method is describing by using Labanotation. These methods will be applied on the project which was about exploring and designing new movements through machine learning. It explored the topic of baseball and the different types of baseball pitches.

Loke and Robertson (2010), conducted two studies in which they tested out movements with dancers and contributed few methods that interaction designers can work with the moving body.  In order to move through them they introduce three perspectives -“The mover” – which offers the first-person experience of the gestures, “The observer” – this perspective provides a view of the body and experience from outside standpoint; and last but not least “The machine”- this perspective offers to see how the machine itself recognises the movement. Through these perspectives they set up the three techniques that are used through first person view: “Playing with Everyday Movements and Gestures”, “Scoring” and “Generating movement from Imagery”.

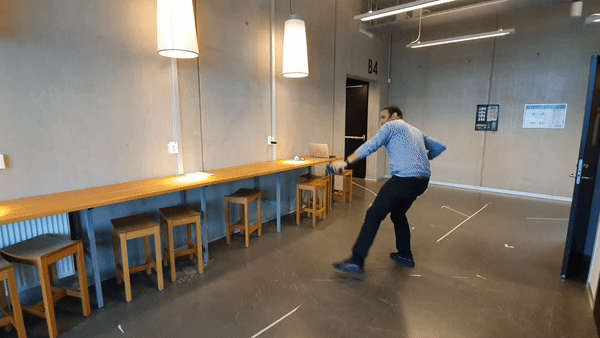
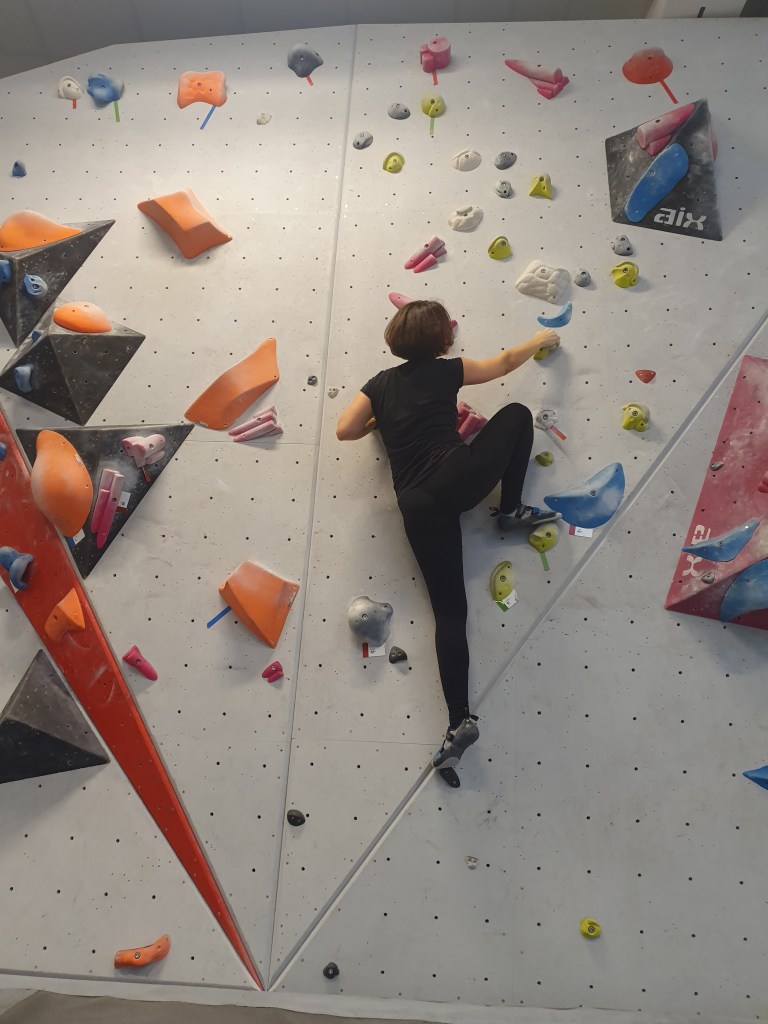
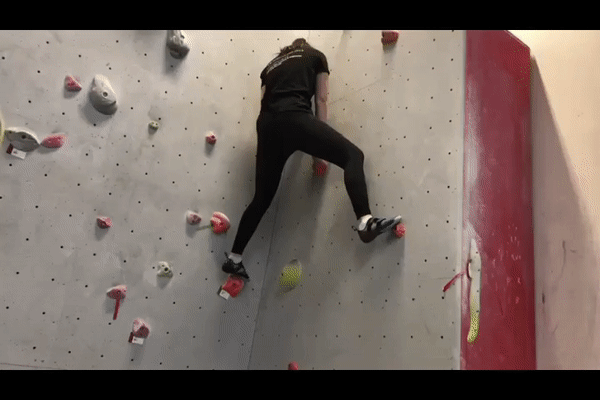
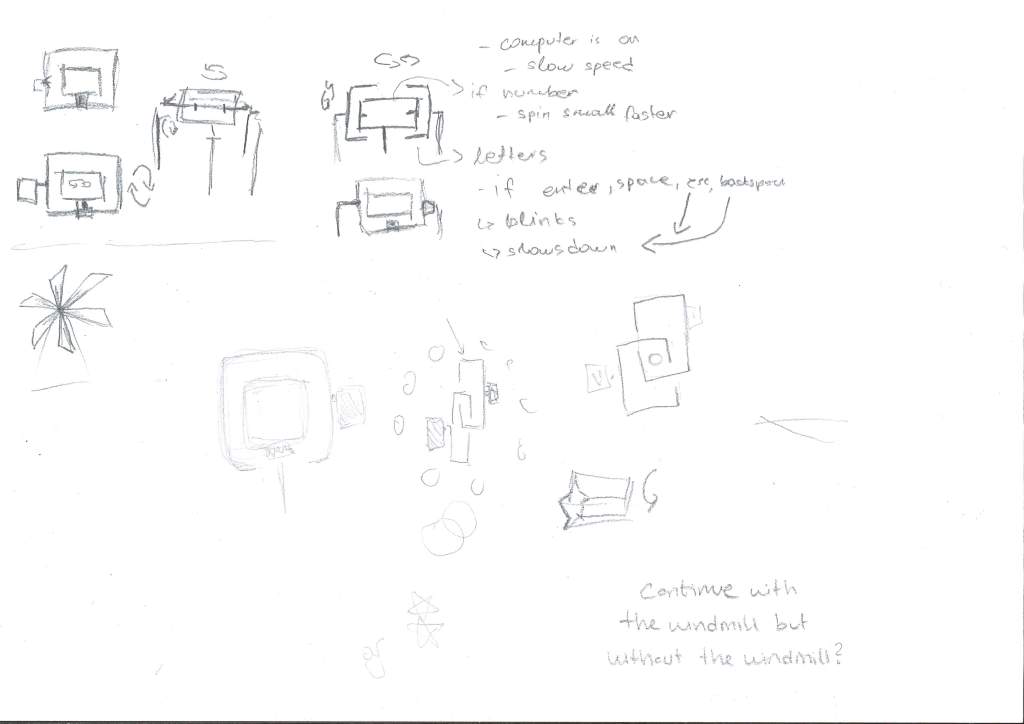
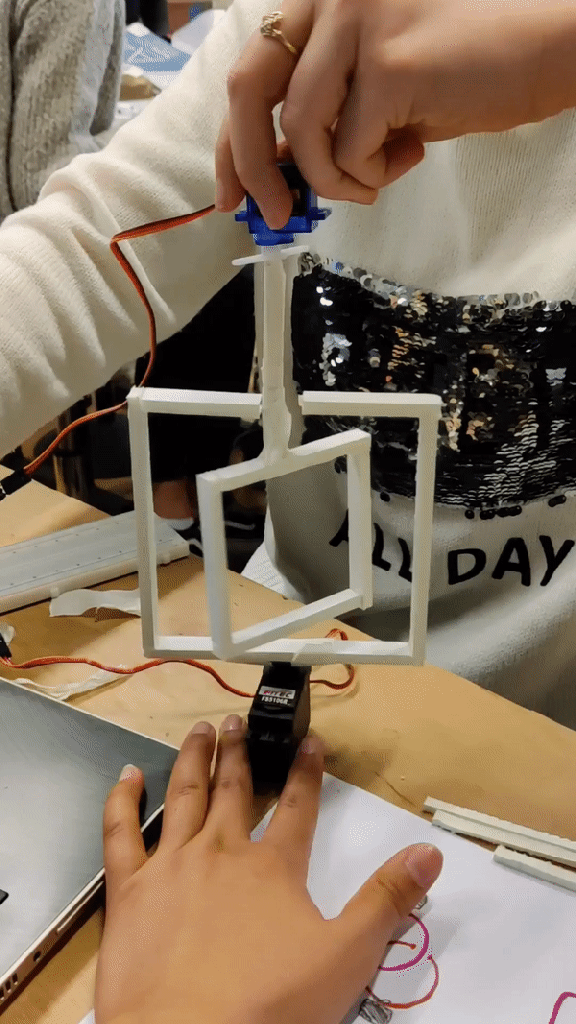
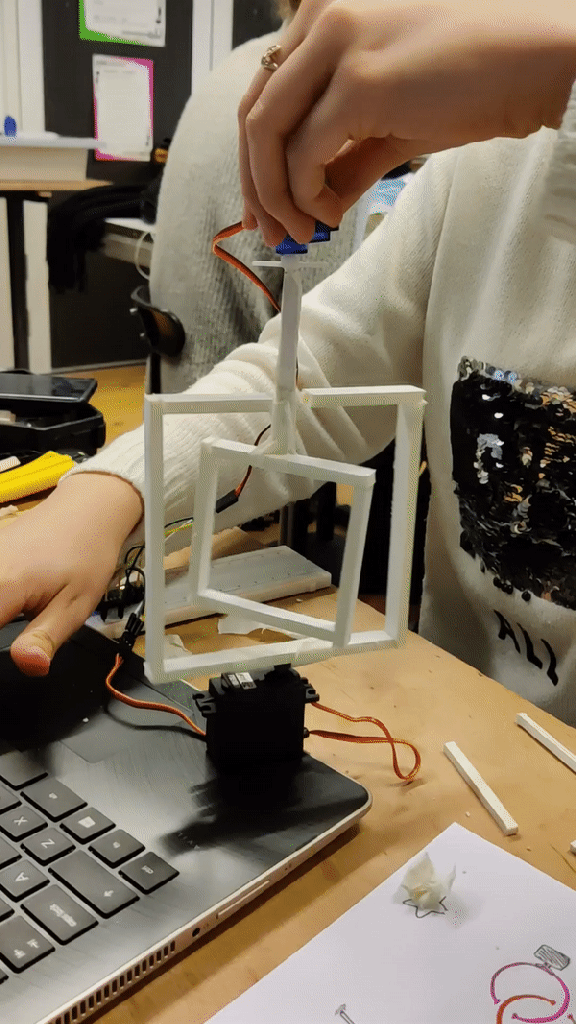
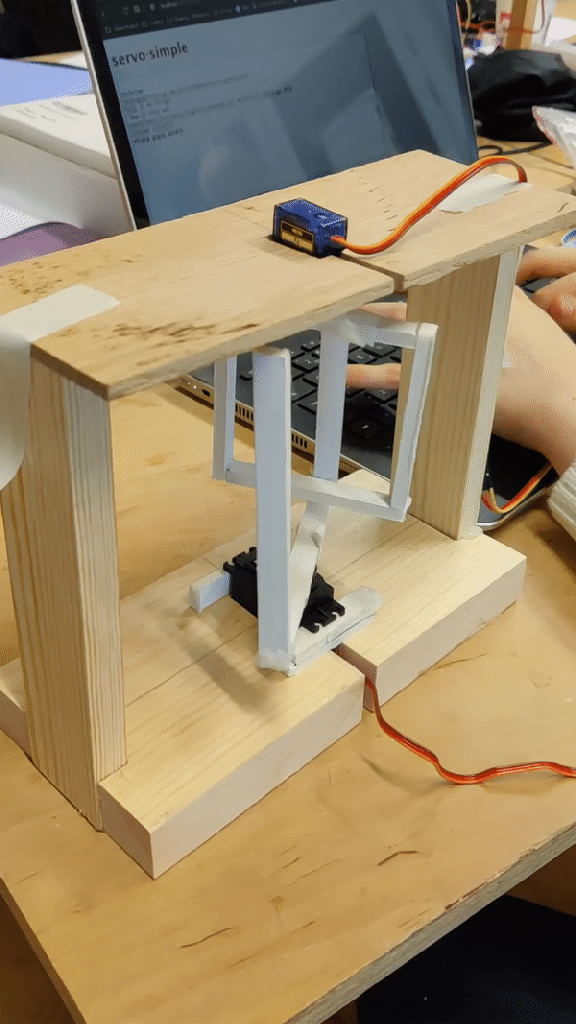
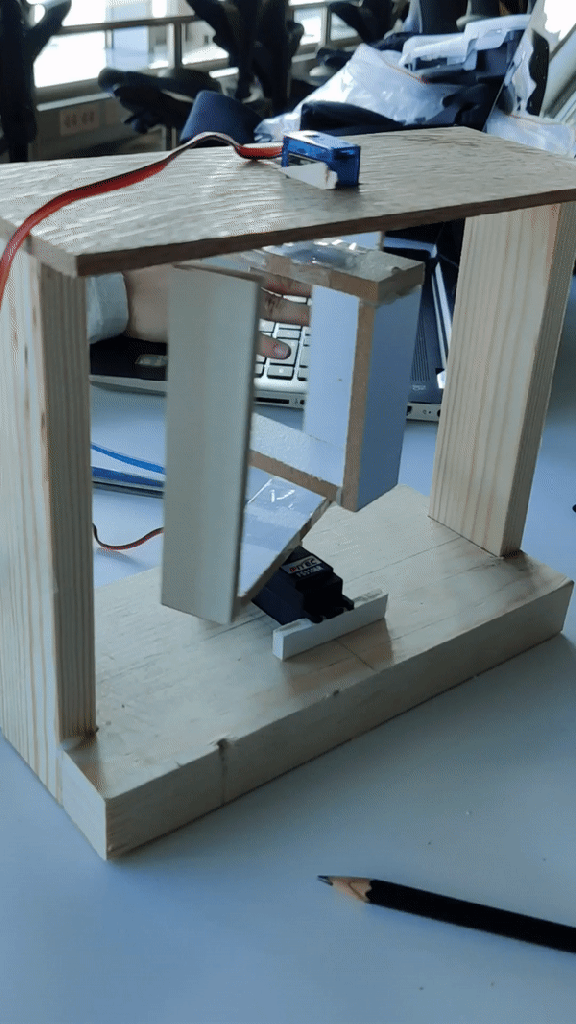
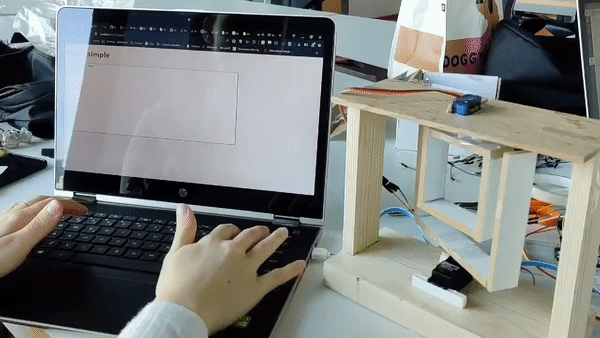
            Each technique has its own principles to follow. Loke and Robertson (2010) explain how direction or speed of the movement can inspire designers to explore more possibilities when designing a certain movement. During the experiment phase of the project, while testing out the code and how it works, some of these techniques were used in order to explore different movements. Working with Machine learning we were able to observe from the Machine’s perspective as well. We started by experimenting with the first technique “Playing with Everyday Movements and Gestures”. While testing out movements, it allowed us to be more intuitive with the changes in the movement. For example, the gesture of twisting the arms, turned more into wave like movement. Moreover, we added different heights to “the wave” gesture. I tried working with different speeds and then comparing the results, by focusing on what was recognised from the machine and what not, in order to do different variations of the same movement.

With these techniques we can also express movements or choreographed ideas through combining text, sketching and images. According to Loke and Robertson (2010)  it can be used as another way to represent an idea or even have an inspirational role. We documented our movements in two ways: Through using written descriptions and visual representation of it such as videos and images. I did not find describing the movement with text much of an inspiration for the project. There was no huge impact on the way we designed or improved the movements we explored. Since it is not an everyday activity, the text description was mostly confusing. According to Loke and Robertson (2010, p. 10), the written descriptions are a “written record of the choreographed movement, that details the specifics of how the body moves, the motivation for the movement and the kind of act in which the movement is contained.” Explaining and writing a description of the movements was a challenge. We found it challenging to figure out how does one describe a movement. Even though it did offer a view from two different perspectives, one of my teammate as the “mover” and one from me as an observer, I did could not find it as useful as the visual documentation, which is explained more in depth below.

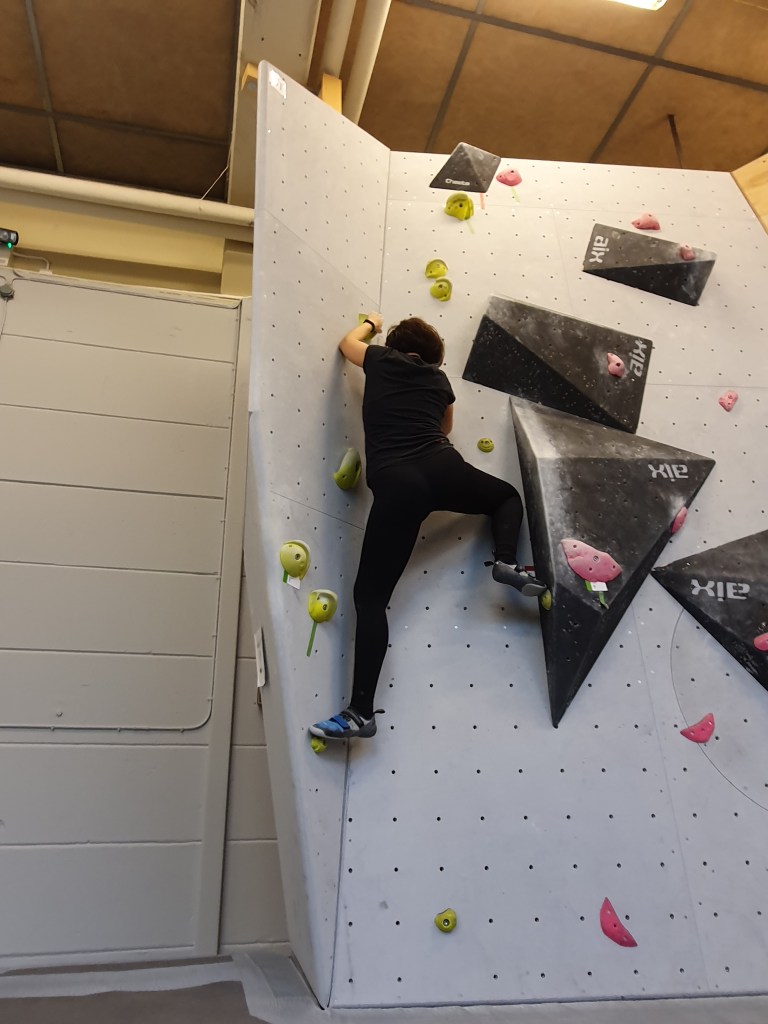
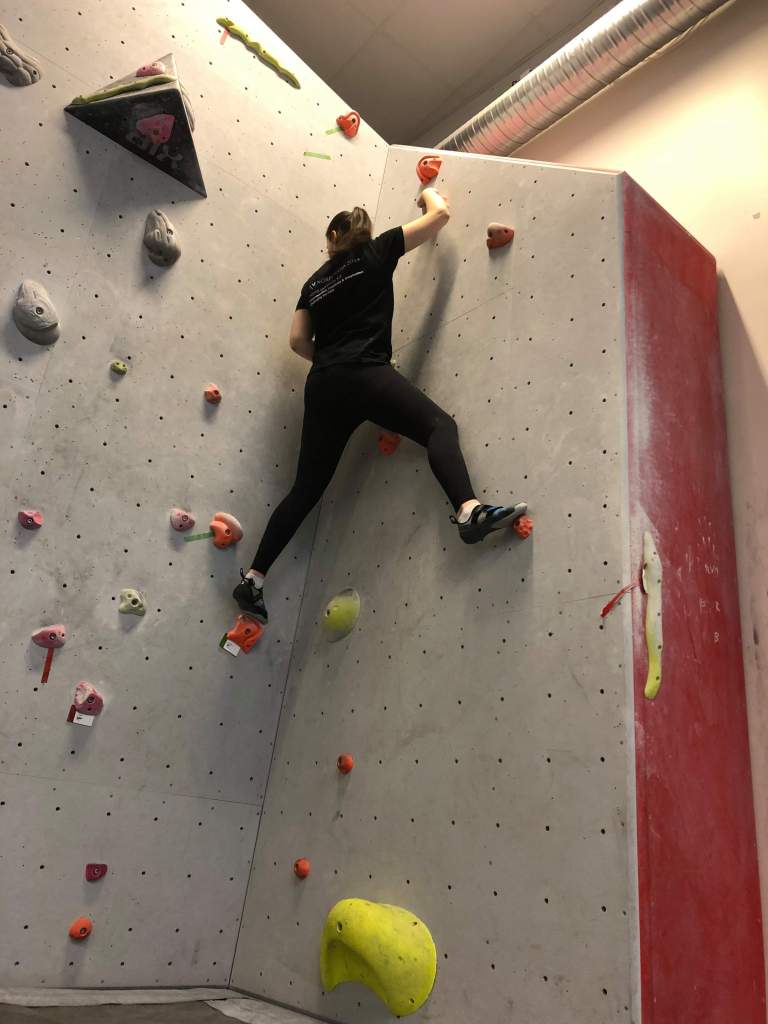
Videos and images on the other hand, did help me open up my imagination of what changes can be done in a movement. Maybe we did not gained much with worded explanations, but images give the option of visualizing and understanding a movement. It helped with understanding how the speed influences the movement itself and when we had to detect small details that are usually missed. We found the visual documentation also quite handy when recording the movement with sensors. Watching the video of the first recordings we realised the speed was quite fast and as a consequence the machine could not figure out the difference. Breaking down the video from the movement into small segments, did help with analysing it. Splitting the movement into parts and later analysing is called Shape Analysis. “The Shape analysis is a description of the changing forms and spatial qualities of the moving body.” (Loke & Robertson, 2010, p. 11). When analysing the movement, it can be split into different shapes, to gain a better understanding of what that movement is created from. In their paper, the authors analyse a movement where the transition of the body starts from what they call “ball-like” position to a splayed “wall – like” position on the floor and back to curled up position. The shape analysis done during the project, presented us with insights as to which part of the movement can be recorded in order to get more useful results.

In addition to what was mentioned above, “A movement can be performed with kinetic variations of speed, scale, and direction to produce different patterns, dynamics and qualities of movement” (Loke & Robertson, 2010, p. 13). As previously mentioned, speed was one of the most important factors when we were recording. The faster the movement was, the more difficult it was for the machine to recognise it. The differences in speed or scale created a possibility to create new variations from the same movement. Since the machine perspective is not the same as the mover’s or observer’s perspective these variations can be important for the recognition in machine learning.  In our project it showed that the small differences in the movement such as moving the arms differently and doing the movement with speed can affect how machine recognise it later. Consequently, the quality of data is being affected. Through experimenting and recording movements, it showed that sensor placement matters. Better placement such as sensors on the arms, and slower speed led to more accurate results and machine recognition.

Labanotation is the second method data can be described and analysed with. According to Hutchinson (1977), “Labanotation is a system of analysing and recording movement, originally devised by Rudolf Laban in the 1920’s and further developed by Hutchinson and others at the Dance Notation Bureau, New York “ (as cited in Loke et al., 2005, p. 114). When creating interactions for input, Loke, Larssen, and Robertson (2005) find Labanotation as a potential tool that can be used for analysing and notation of the movements. They argue that this can provide a good starting foundation when designing a movement-based interaction. “There are three essential forms of movement description in Labanotation – Motif, Effort-Shape and Structural” (Loke et al., 2005, p. 144). Following the definitions in the paper we can describe them as the following: The form of describing only the main parts of the movement or the motivation behind it is called Motif. When describing the aesthetic, emotional and expressive qualities we use Effort-Shape. Last but not the least when we want to describe a movement in a most specific description, we use the Structural form. Most of our movements in the project were described using the Motif. The reason for using that form in specific was that it was a project where the final outcome was not the goal rather than exploring and trying to design new movements. The simple analysis provided us with descriptions fast enough to move forward with our project. The disadvantages of this form were the lack of details in the description of the movements. We never went to explore how the movements would feel like if we changed how the movements look like or what exactly they are expressing rather than where the hands go when throwing the ball. We also learned that the act of describing a movement based on its components and the motivation behind it can be challenging without a proper research of the movement itself. We noticed that before we did background research on the types of pitching movements, it was challenging to describe what was the motif rather than a simple ball throw. The research of the topic made the description to be easier.

All things taken into consideration, the methods that Loke and the colleagues (2005, 2010) mention in their papers about describing and analysing movements, are useful in the process of designing movement-based interaction. They inspire and guide us throughout the process of designing, which can be chaotic and messy sometimes. Some of them such as the three different perspectives can be used in different scenarios, such as machine learning and movement-based interaction with technology. Documentation is important for movement-design, as it inspires, sand it can be handy to look back at the iterations of the movement. Even though text documenting was not useful for us, it might be useful for other people. Visual documentation on the other hand opens better imagination through visualisation. In addition, analysis with Labanotation is effective for good analysis of a movement. Its three different forms can be used for thorough analysis. Depending on how in-depth and detailed we want the analysis to be, each of these forms can help when we try to achieve a certain goal. As stated by Loke, Larssen, and Robertson (2005, p. 120) “Labanotation and its underlying movement analysis system offer an understanding of the moving body and its movement potential that can act as a foundation for the design of movement-based interaction.”. With this base, the path for merging movements and interaction with technology is wide open.

Reference list

Loke, L., Larssen, A. T., & Robertson, T. (2005). Labanotation for Design of Movement-Based Interaction. Second Australasian Conference on Interactive Entertainment, 1996(November 2005), 113–120.

Loke, L., & Robertson, T. (2010). Studies of dancers: Moving from experience to interaction design. International Journal of Design, 4(2), 1–16.

How movement can be articulated for the purposes of design? – Final Essay

The aim of this paper is to discuss and critique how movement can be articulated for the purposes of design, based on the texts by Loke and colleagues (2005, 2010). In addition to this, it will analyse how creating movement can contribute to a design project. This design project was part of a University course in which, the objective was to explore different movements and their experience while working with machine learning. Furthermore, this paper will discuss the findings that Loke, Larssen, and Robertson (2005) present about their investigations how Labanotation can be useful for the design practice.

 We experience the world with our bodies. Walking to places, using our hands for different activities, working out and more, gives us the opportunity to interact with objects using our bodies. For a long time, movements and gestures has been used within technology to create better interactivity. For example, we can take the finger gestures used on our smartphones, swiping, typing and so forth. In their paper Loke & Robertson (2010) explain how the interactive technologies are becoming more embedded in our daily lives, are movement-based, which leads them to be more sought after. Consequently, designers try to design new movements for those technologies. To gain a better understanding of the movements, according to Loke and Robertson (2010, p. 12), designers can work with three different perspectives. “The mover” – which offers the first-person experience of the gestures, “The observer” – this perspective provides a view of the body and experience from outside standpoint; and last but not least “The machine”- this perspective offers to see how the machine itself recognises the movement. All three of these perspectives have their own unique value. The mover would allow the person to gather the full experience from working with a movement. From the physical experience to feeling the emotions gained from doing it. The observer, on the other hand, has a picture of how the movement looks like but it is not able to fully grasp the feelings of the movement as it is not the one performing it. Finally, the machine reacts to what it has been taught. That being said, in the following essay I will present why movements can be used for the purpose of creating better interactions.

Loke and Robertson (2010, p. 10) state that “the movements/choreographic ideas can be expressed or articulated through a combination of text, sketching, and images”. The documenting of the movement can usually be done in two ways. The first one would be through using written descriptions of the movement itself and the second, of visual representation of the main steps of the movement. According to Loke and Robertson (2010, p. 10), the written descriptions are a “written record of the choreographed movement, that details the specifics of how the body moves, the motivation for the movement and the kind of act in which the movement is contained.”. They also explain that the visual documentation can be used for informing the designers about which movement can be detected by the system. As part of the Interactivity course for Module III, the focus was to learn how to design movement and implement its data into a machine. Working with these methods of documenting was useful while exploring which movements would be interesting enough for us to work with. In order to portray the movement in the right way, the mover described how it felt doing the movement and what the movement looks like from their perspective. Another written description was taken from an observer’s point of view. These descriptions offered different angles for the movement to be looked at, since the mover undergoes through the full experience not just with the body but with feelings as well, while the observer can not grasp the whole experience since they do not go through the movement.

         Furthermore, based on the paper from Loke and Robertson (2010), we can describe the changes of the movement with shape analysis. “The Shape analysis is a description of the changing forms and spatial qualities of the moving body.” (Loke & Robertson, 2010, p. 11). When analysing the movement, it can be split into different shapes, to gain a better understanding of what that movement is created from. In their paper, the authors analyse a movement where the transition of the body starts from what they call “ball-like” position to a splayed “wall – like” position on the floor and back to curled up position. The design practice in the course, afforded for us to be able to recognise and analyse movements according to the shape analysis. Breaking down a movement into a few different parts can help with gaining a better understanding of how the movement is done and why is it done that way. For example, the activity of climbing consists, of ‘problems’ that needs to be solved. Each of those problems can be solved in a few different steps. One of the more impressive moves while climbing is called ‘heel – hook’ when the climber uses his or her foot to create a hook to hold while going up. Diving the movement into shape would begin by standing in a ‘wall-like’ position, then the leg gets closer to the torso in a hook position, and the last part would be straightening up back to ‘wall – like’ position. After separating the movement into segments, it becomes much easier to record variations of that same movement by changing a few of its traits.

“A movement can be performed with kinetic variations of speed, scale, and direction to produce different patterns, dynamics and qualities of movement” (Loke & Robertson, 2010, p. 13).  The differences in speed or scale can open a possibility to create new variations from the same movement. Since the machine perspective is not the same as the mover’s or observer’s perspective these variations can be important for the recognition in machine learning.  Machines are not living beings. They work based on how they are programmed which indicate that they cannot think on their own, as a result they can only work and react to the data that is being inputted. Based on the design practice from the course, it was eye-opening that the small differences in the movement can affect the machine recognition a lot. For example, a simple gesture like moving the arms up and down would be recognised much easier than per say a more complicated embodied movement. The sensor placement also is a very important part of creating new movements. As much as it allows the designer to experiment it can also present a constraint as some parts of the body while moving offer better recordings of data. For example, recording the movement of baseball pitching in different ways resulted in different recordings of data. While the movement was recognisable by the observer, when done quickly the machine was not able to make difference between the details. When the sensor was placed in the hands rather than the thighs and done in much slower motion, the machine was able to recognise the movements. 

Another way of analysing and describing movements is Labanotation. According to Hutchinson (1977), Labanotation is a system of analysing and recording movement, originally devised by Rudolf Laban in the 1920’s and further developed by Hutchinson and others at the Dance Notation Bureau, New York (as cited in Loke et al., 2005, p. 114). When creating interactions for input, Labanotation is a potential tool that can be used for analysing and notation of the movements. In their paper, Loke and the other authors discuss the advantages and disadvantages of using Labanotation in design. The main advantage they argue for is the possibility of easily linking the representation of a movement into the context of interaction. Furthermore, they argue that this can provide a good starting foundation when designing a movement-based interaction. “There are three essential forms of movement description in Labanotation – Motif, Effort-Shape and Structural”(Loke et al., 2005, p. 144). Following the definitions in the paper we can describe them as the following: The form of describing only the main parts of the movement or the motivation behind it is called Motif. When describing the aesthetic, emotional and expressive qualities we use Effort-Shape. Last but not the least when we want to describe a movement in a most specific description, we use the Structural form.

Labanotation was present when we were analysing and describing our movements in the final project. Most of our movements in it were described using the Motif. The reason for using that form in specific was that it was a project where the final outcome was not the goal rather than exploring and trying to design new movements. Since we were exploring baseball pitches, the aesthetic side of the movements was something that for me personally did not matter. The simple analysis provided us with descriptions fast enough to move forward with our project. The disadvantages of this form were probably the lack of details in the description of the movements. We never went to explore how the movements would feel if we change how the movements look like or what exactly they are expressing rather than where the hands go when throwing the ball. We also learned that the act of describing a movement based on its components and the motivation behind it can be challenging without a proper research of the movement itself.

All things taken into consideration, movements are included in the design of new interactive technology. With the progression of the advancements in technology and the new gesture-based technology, designers focus on creating new gestures and better interactive environments. As mentioned, describing the movement and analysing it through a few different systems and methods will be of assistance when combing the movements with the machine. The three perspectives, give the designer a different view on the movement, while the Labanotation offers three forms of analysis. Depending on how in-depth and detailed we want the analysis to be, each of these forms would probably fill the mold to our expectations. As stated by Loke, Larssen, and Robertson (2005, p. 120) “Labanotation and its underlying movement analysis system offer an understanding of the moving body and its movement potential that can act as a foundation for the design of movement-based interaction.”. With this base, the path for merging movements and interaction with technology is wide open.

Reference list

Loke, L., Larssen, A. T., & Robertson, T. (2005). Labanotation for Design of Movement-Based Interaction. Second Australasian Conference on Interactive Entertainment, 1996(November 2005), 113–120.

Loke, L., & Robertson, T. (2010). Studies of dancers: Moving from experience to interaction design. International Journal of Design, 4(2), 1–16.

Show’n’tell #3

For this presentation, I let Richard to present our findings and conclusions. The day before when finishing our recordings, we faced with many technical problems and as result we did not have a working prototype to present.

To explain what we did research for, Richard began by showing the video of the movements and then answered the following questions

Why did we choose to work with this movement?
” It offered a fully-embodied movement. It included most of the body parts in order to do the movement. Even though when recording we focused on the thighs as we thought they offered more for the nuance of the movement. We wanted to see if the machine can recognise the small details in the difference of the two different movements we recorded: the normal pitch and the sidearm pitch.”

How does it feel to do the movement?
While experiencing the movement, few things come in the light. Body parts like the neck and the torso are also used in the movement itself. For an observer the torso seems like it is only spinning when the leg is being pushed, but as a participant you have to use the abdominal muscles to move your legs to spin and then pitch the ball itself with the arms. 

The movement in itself is actually quite hard. In fact, it isn’t uncommon for professional pitchers to have multiple surgeries during their careers. Our pitching wasn’t nearly as hard as theirs, but we still experienced muscle fatigue and had as a result take brakes.

Similarly, the neck muscles are definitely not something the observer notices since the corresponding motion looks like an ordinary head turn. And you barely feel them being used while performing the movement. But the neck muscle pain experienced in the aftermath proves that there’s much more to pitching movements than meets the eye or even feels like initially. Again, it confirms our original thought that pitching involves most of the body.

What did we learn from this project?
Acquiring knowledge how machine learning works, was not the only lesson that we learned in the past three weeks. As one important key in this project was recording and working with data. Few of the recordings were useless since they did not contain quality data. It became clear that the point is not to only record rather than figure out what exactly can contribute to having better predicting machine.

That quality data can be influenced based on where the sensor is being placed. While we had the phones in the pockets trying to record the movement did not contribute to the training, but switching the sensors to our hands gathered better data.

New data recordings

Re-exam (underlined text is part of the re-exam)

Today we worked on recording new data with the code where we can record with two devices at the same time.

Why did we wanted to work with two devices? One device or one sensor offers only a certain amount of data for detailed movement. One of the goals we wanted to try and achieve is to train the machine to recognise and distinguish between two types of movement. As previously mentioned I do not know much about baseball. For me pitching a ball can be a ball thrown. Going to through the process of recording and trying to train the computer to find the difference between them was a challenge. This is why we thought the data from two devices can be more useful. Next thing was to connect the phones and to record the movements.

Trying to find second movement was a small challenge. We wanted to find similar yet different movements, which will test if the machine can figure out the difference between the two movements. The first movement was the regular pitch. The second one was called sidearm pitch. If we see the GIF below it shows how the player throws the ball over his shoulder in the first one, while the second one represents the new movement. The difference is not big, from an observer point. Since it’s quick movement can be quite easy to miss or recognise the movement wrongly. After setting up the phones we started recording the data for the Machine Learning.

Regular Pitch – img source
Sidearm Pitch – img source

Before working with the two phones, we focused on recording a separate thigh movements from the move itself. We did not realise that this might be a problem when recording with two phones where the difference between the movements. The data we collected was really bad. The computer was not able to register any movement. This is when we changed the placement of the phones, from being in the upper pocket in the things, we switched them to the arms. The arms offer much better movement, plus it made us to do the movement slowly rather than quickly. One from fear to drop the phones, two to create better recordings.

Sadly even when doing the movement slowly it was difficult to record since there were many technical issues. The code would break or it will stop recording, then we had to save the good files with the data and start recording again. Then we had to rename the files so we can train the machine. All things considered we lost a lot of valuable time trying to get the computer recognise and record than learning and experimenting.

Tomorrow we are presenting. I honestly do not think we have done enough for the project or got some findings that were not known before. I do not have much to reflect on about this project except few things that I learned.

  1. Machine learning
    • Data is being imported and the machine learns to predict based on that? It is very fascinating that numbers from sensors can create something like a computer to recognise movements or anything in general.
    • The topic was fun to work with and learn but also frustrating. Not knowing how exactly to work with the code can become a challenge to improve. Once the basics are under control it can be fun to work and experiment with
  2. Types of data
    • When we began I had an impression that data is just data. We can put any data from the sensors and it will work, right? Wrong! The quality of the data is important part of the training machine to recognise the correct movements, especially when working with complex movements like pitching.
  3. Experimenting
    • Trying out different things and working with them in combination with machine learning, was fun for us and this project till a certain extend. I do not think we tried enough movements or different topics to record, mostly because of the lack of time and the technical problems. If we ever have a chance of redoing the project, I would like to experiment more and learn more about machine learning.

Questions
In this project, following the paper I have few questions running through my head making me wondering about the topic:

  • How can one explain how does one movement feel?
    • It was very challenging to describe the movement with words. In one of the papers, the mostly the describe how the movement looks, like ball-like shape or horizontal wall – like movement. Usually when we do movement we might say that it’s comfortable or uncomfortable. The challenge of designing new movement and explaining with words how does it feel was present during this project.
  • How can we split the movement into shapes that can be explained with words?
    • Another challenge when it came to being reflective about the movement we worked with. When one part of the movement had a distinguish shape it can be easily recognised but sometimes during our project, the shape of the move was unique. This made me wonder how can we describe those special shapes, how can we reflect on them and describe them.
  • What does it the difference between the person doing the movements vs the person observing the doer?
    • Experiencing the movement by doing it can influence how one person perceives the movement. I’m wondering if there are some other differences that show up between these two?

Overall I believe if I could I would done few things differently and work more with creating actual movement rather than only focus on the technical stuff.

Climbing as a movement and Coaching

While exploring movements on my own, I thought if i could include one of my hobbies as part of this project. Indoor climbing or bouldering. One of the reasons why i tried exploring this activity was the fact that is full of movements, which one small change can influence how one person gets to the top.

In bouldering usually, people climb ‘problems’ or paths. They can be separated in different levels depending how difficult the problem is.

As someone that likes to climb, it’s easy to put myself in two perspective. Climbing is a sport or an activity where you learn by watching how other people solve the problem, and then trying yourself. This allowed me to become the observer for a short while and watching how people get to the top, learn their techniques of keeping them on the wall. Do they pull their body and hips near the wall to keep their balance or do they prefer to have their arms straighten and use leg force to get up.

If we analyse the movement as a whole bodied experience few things show up. Some movements require slow and steady climbing while other the climber has to use momentum and strength to keep themselves up. Climbing down can be as challenging as going up. The legs need to placed securely on a stone or pushed to the wall to keep yourself balanced while going down.

Exploring movements while climbing down

Later today I met up with Jens. I explained that we as a group were lost, and that I feel not much work has been done, considering we should be presenting in a week. Jens explained that, we don’t have to so particular about the topic. Also when we pick a movement, we should try to figure out how changes can make the movement feel differently. We should ask ourselves why is that movement interesting to explore? Why would it be relevant for this project? Another thing is to try and create variations of the same movement.

He also explained what matters is trying to describe the movement with words. How can we use the language to explain what one feel when they do the movement? The focus should be on describing in all three perspectives, the two from us and the the machine based on how the computer learns the movements.

Baseball – Pitch movement

Re-exam (underlined text is part of the re-exam)

Today Richard suggested for us to work with baseball. He showed me videos in which people pitch the ball in different ways. The videos were from a professional pitcher, a signer and a professional athlete that is not part of the baseball sport. He told me the difference between each movement. Which one is correct and which one is not.

Baseball Pitch – img source

As someone that has zero experience with baseball, I could see the difference but in the end for me those pitches were different ways of throwing the ball. If I analyse the movement based on what I can see, I can separate the movement in the following points:

  • Prepare the body in the starting position
  • Lift the hands up to your chest
  • Left leg is in the front
  • the right leg is used to push for more strength
The ‘frames of the movement’ – img source

To explore how the movement feels and to try to describe it from the two perspectives ‘the mover’ and ‘the observer’, we tried to do the pitch and record the data for it in the machine. How does it feel to do the movement? What kind of physical demand does the move have? Would it be easier to do the movement slower?

Richard was the one that did the movement, while I focused on the recording and observing in the same time. From my point of few, it seemed as if the movement was mostly present in the arms and the legs. Preparing and throwing the ball seems connected and the whole body works as one unit. Richard did confirm that he used the whole body and even though I couldn’t see it, muscles in the shoulder/neck area were used, same with the core. He did got tired after doing the movement over 20 times, as the recording sometimes crashed and we had to start from scratch.

Exploring pitch movements

The sensors or the phone was placed in the pocket. Richard had concerns about having the phone in the hand while doing the movement, so we focused more in the data that can be collected from the thing movement. That created a small constraint that did not allow us to focus on the movement as a whole- bodied one rather than only one leg at the time. For the recordings we recorded both legs, first the left thigh then the right one. I suggested, to find a phone holder for running which might allow us to record the arms as well, but there were some challenges in finding a compromise.

In the end we decided to work with the data from the thighs, as Richard wanted to explore if the nuance and the details in the leg movement can be recognised by the machine. Which essentially turned out to be okay and working. The machine did recognise the difference in the right and the left thigh. I would have preferred to have the phone in the arms, as if noticeable there is a lot more movement in the upper body than the legs.

Technical problems and Coaching #1

The first week, of the module was supposed to spend on tinkering the code and finding ways to explore and create movement. How to imagine that movement? How does the machine ‘views’ it? What does it feel to be the one doing the movement or observe it?

Sadly instead of working on asking questions and exploring how the code can be implemented we spend the whole day, trying to fix the technical side of the project. Jens provided us with a sketch that should work and which is being run through node and ngrok. For some reason the sketch which was working on my laptop few days ago, it was not possible to get it to run today. I kept getting an error which even after googling I did not know what to do with it. Upgraded node, reinstalled ngrok, downloaded the sketch again and much more but nothing was working.

Since we had signed up for a coaching session, when it was our turn, Clint tried to work on my computer to fix it. The error kept popping up and it was impossible for the code to run with it. In the end, as my last hope I decided to remove node completely from the computer and install it again from scratch. It worked! The possibility to work the sketch was now there, with that we continued to getting feedback for our ideas.

We had few ideas of movement that might have been interesting to explore.

  • Checking the watch
    • It has wrist movement
    • Hand/Arm movement
  • Calculating the distance while running
    • Leg movement
    • Counting steps
  • Movement as a controller
    • Instead of buttons why not create a movement that will act like a button
  • Controlling the interface with movement

Clint explained that in the end the goal in the project is not how to create a product or have a targeted person that the project would be useful for. It would rather be important to explore how does movements differentiate from each other. He said we should pick either a certain activity, such as checking the watch, or particular part of the body. Like what kind of movements can we do with feet? What would be interesting to explore there and find out? Or if we want to explore body parts such as shoulders, how would we test that out and such? He suggested if we can not do one of those we can just choose a certain movement and ask ourselves questions like – What would be different versions of that movement? How does it feel if we do the movement slowly or we use speed to do it? Does the difference between a gentle movement and harsh can be recognised from the machine while recording.

He recommended to have a brainstorming session in which we will try to explore all the points above, since the technical problems brought us to fall behind with the working schedule.

It is our goal to train the machine to recognise the movements we want to work with. In the first module we worked with already trained sketches which had tons of data in them. In this module we should teach the computer how to recognise the different movements based on the data received from our smartphone.

After the coaching session we had quick brainstorming session, in which we talked about different body parts and their movements, which we would be interested in exploring in the following weeks. We did not opt to pick an activity since it seemed like it offers a lot of constraints. We paid attention on the question like ‘How would it feel to make that movement?’ . In the end we ended up with the following list:

  • Fingers
  • Forearm
  • Wrist
  • Ankle
  • Torso
  • Shoulders

At home, while testing out the constraints of each one of these, I realised few things.

  1. I am not able to record finger or wrist movement. The size of my phone was one of the problems as it did not allow for me to attach it to my finger.
  2. The movement of the forearm like either palm up or down, does not make much difference to the machine as it only sees the movement as the same.
  3. Wrist only movements were difficult to record. Either they had to be mixed with forearm or hand. It was also in some kinds bit limiting as the phone was an obstacle.
  4. The torso was interesting part to be recorded as it can be very static and not much movement happens. The only movements i tried out was bending and turning left to right.

Module III

Today we are starting the last module of this course. Jens introduced the module and the topic we are going to spend the next three weeks working on.

Learning goals

From the course the learning goals are:

  • To understand what is machine learning and what is being used for.
  • To explore the possible usefulness and difficulties of machine learning as a ‘design material’ for interaction design.
  • Learn how to use machine learning in relation of recondition of bodily movements and gestures
  • Get an understanding of machine learning in the broader context of artificial intelligence

Topic

The topic of the course is ‘ machine learning as design material for interaction design with regard to bodily movement and gestures (embodied interactions)’

How to use the body to gesture and how to use the machine to learn and understand these gestures. In module I we worked with sketches that were already ‘trained’ to recognise a body or a movement, while in this module we are going to work on our own models that will try to recognise a body gesture or movement.

This will be based on the data that comes from the data, and when the phone is moved that data will be used as an input data for the sketch. In this course we are going to experience more with the material and what it can do and what not. The module itself is focused on tinkering the material before we actually try to implement our ideas to it.

We are still going to follow the usual design process:

Tinkering > Ideate/Sketching > Implementing > Experience/Reflect

Why this topic?

The practical value of machine learning as a material for interaction design is not very known. In the module we should explore if it will work or not? What difficult it is? What can be that used for? How after all of this can help with understanding the bigger question with artificial intelligence?

How to work with this topic?

Usually when we input something in a program we expect to produce an output. We program the algorithm exactly how to work with data and what to do. While in machine learning we will not do that. Instead of writing an algorithm we give the computer more examples from where the mouse for example is on the left or the right side, the machine after a while will be able to predict by itself whenever the mouse is on the left or the right side.

When we are working with gestures, we are working with limited amount of gestures. Most of computers or even phones might be trained with machine learning about different gestures. That comes out as positive side when we do gestures that are similar to each other but not exactly the same. Exploring new gestures and movements can be much easier to use machine learning than writing an algorithm about it.

For this module, we should brainstorm about what kind of new gestures we want to work with? What body parts are we going to use to create those gestures? How does it feel to attach the material to our bodies and work with those new gestures? Is the speed of the gesture important and does it have big influence?

This topic in general allow us to be as creative as possible since it is full of opportunities that could be explored!

Setting up the framework

To begin working with the machine learning project, today we also set the framework which can be used a base. The script allows us to connect to a server that can be accessed to our phones which can be used to record motions that will be used later to ‘train’ the computer. By collecting data and recording multiple tries from the same motion, will allow the computer to recognise similar motion in the future.

Show’n’tell #2

Re-exam (underlined text is part of the re-exam)

Today was the final day of Module II. As part of the course and like in module I, we presented our projects that we worked on for the past three weeks. This presentation has the goal to give feedback and critique the ideas or projects we have, which is supposed to help us with questioning the ideas more in depth.

First the presentation. We decided to meet up today and prepare given that we were the second group presenting. Since I consider myself a lucky person, one of the servos decided to stop working today. It was working for the typing and erasing part but it did not want to move to new position when ‘enter’ is being pressed. The code was not changed since our final test neither the wires or the servos. Overall I believe we presented the idea well. The prototype was responsive and it felt perpetual when in use.

Clint and Jens, also gave us few questions we can reflect more on and think about. These questions might help us with the upcoming 3rd module.

  • How does it feel using it?
    • The prototype itself was easily interactive and fun when using it. The visualisation of the typing, made me personally to either type faster or be aware when i delete a word. Since the prototype was spinning both forward and backwards there was a lot of sound created. The sound itself may become more annoying with time, which might leave the user not wanting to interact with it.
  • The different material experimenting, what was the difference?
    • In the beginning we worked with a type of material that was thicker than a paper, but less strong than wood. While testing out the prototype we almost broke our servos since the material couldn’t handle the spinning when it came to keeping the shape. Later we changed to more stable material such as wood. The prototype itself was much heavier and the we had to change the design in small proportions in order to get the smaller servo to run without any problems from the weight.
  • What makes it more continues?
    • Having the visuals of your typing speed and deleting words, can make a person more aware of their typing. This might make the user type more continuously and try typing without stopping if they find the visuals satisfying. For me at least the sound of working with the prototype made me want to type more in order to see it working.
  • What did we learn of actually using it and trying it out?
    • Talking about the idea on paper did not fill the justice of trying out the prototype. We had to experience and work with the material to learn which designs are possible and which not. When we sketched out the idea, we did not consider the weight of the material or how it would work with the servos and their cables. Working with physical object from our idea helped us to understand and create better.
  • What might be the next iteration?
    • We wanted to figure out a way to remove the cables of the servos. If that is possible, it will remove the physical restrictions of the design itself. Another thing we wanted to maybe work with is add more “dimensions” in the prototype which will react differently depending on the type of letter or speed of typing. It can be also made to detect a difference if the typed character was a number or a letter.
  • What are the parameters we experimented with?
  • What are the dimensions of the project and what is the experimental quality is?

From new idea to Final Prototype – Week 3

Monday

While mindlessly scrolling through Facebook, I cam across this crazy video from a amusement park. It was spinning if few axis and directions.

Video of similar amusement park ride

At first glance it gave me an idea of how we can use the servo, to move shapes in few different directions that are within each other. The important part was to remember to exclude the symbolism to real life things. Oh and also physics. How are we going to create an object that will be inspired by this look.

One problem that we faced, was with the physical side of the project. One important thing slipped my mind was the fact that servos have wires. So putting them on a spinning frame was not an option. Through the process of sketching we explored the possible ways of placing the servos and how would they work the best. We still wanted to keep the symmetric look of the object while expressing feedback.

Sketches

After ideating and figuring out how can we get over the physical obstacles, we signed up for coaching. Since we were running out of time, and there were few days to wrap up this project and present it to the show’n’tell, we did not want to risk and go with an idea the teachers might consider bad. We met up with Clint and showed him our inspiration video and the concept we want to go with. He told us to try and come up with more sketches and experiment with different materials, that might offer similarity to our concept. He suggested to use material between the objects which are connected to our servos and with that the spinning of the material would be a feedback for the typing speed.

Tuesday

Since we needed a physical object, that will create a feedback, we spent the whole day working in the workshop. Since we needed to create a base where the servos can be placed and to offer support for the squares that will spin, we wanted to choose sturdy enough material. The best solution in that case was to create a wooden frame for the best support, but to begin with we chose to work with easier materials.

I am not sure what exactly the material is called, but it seems like it’s paper with the spongy middle. It was easily bendable and not very heavy, hence why easy to be used with small servos without causing too much pressure on the motor. Another positive side of it was how easy was it to cut and put together.

Testing the first spining

However things can also go very wrong. Since the material was not heavy was not much support and we couldn’t keep the balance well on our own.

One of the many failed attempts to keep things in order

To solve the problem, of us not being able to keep the boxes balanced we decided to work on the wooden frame before we actually do something with the boxes and their different materials. Since we already have chosen to place the servos one on the bottom of the base and the other one on top, the only thing that was left to do was to choose work and place it together.

After putting everything together we realised few things.

  1. The material was too soft for this creations, mostly because if one of the servos move just a tiny bit, it creates a lot of problems. Problems such as bending part of the boxes, the boxes get tangled.
  2. The top part of the box, which was supposed to ‘close’ the bottom box, had to be removed mostly because, it affected the spinning.’
  3. Cables, should be somehow put aside, they can get tangled on the motors very easily.

At this point we replaced the soft material with wooden boxes. Since it was almost the end of the day, we decided to wrap it up for today and continue tomorrow with fixing the last piece of the code and making sure everything works nicely for the show ‘n’ tell.

Wednesday

Starting where we left off, the plan for today was to polish the last part of our prototype and the code that was working.

While Thanita was working on polishing the prototype, I focused on making the code to work more accurate and to actually present the typing. At the moment was working but with a delay that first counted how many times a letter was pressed then, based on the counter the speed was added to the spinning.

The delayed spinning

For us that was not really close to the idea we wanted to achieve. Given that we wanted to make the prototype, not spin only for the sake of spinning but rather, really grasp the experience of typing on a keyboard.

To separate the keys, I added few conditions which had to be fulfilled in order the prototype to spin. First I wanted to separate the keys like enter space and backspace. Each one of these represented different things

  • Enter – A new start.
    • When the user presses enter, the two boxes will move to a new position, signifying that the user started a new line or new starting point.
  • Space – A new word.
    • The code works based on the amount of typed keys. When the user presses space the counter which contains the number of letters is being reset. That counter is being used for the speed of the servo. The longer the word, the higher speed.
  • Backspace – Going backwards
    • Deleting characters makes the text cursor go backwards. We wanted to implement this in our code, when someone presses backspace the boxes to spin backwards, representing the going back part.

First the user types something, the program checks if the button that is pressed is any of the ones above, if not then it continues to the normal counter which increases or decreases the speed of the boxes based on the number or letters.

With that this was our final prototype

Final working prototype

For future iterations, the servo motors can be replaced with ones without a cord. With that the possibility of adding a third axis would be possible. That axis can represent the difference like lowercase and uppercase letters.