Coaching #3

After the last coaching session, the focus was moved from the pixel and frame examples to the pose examples with the library posenet. Since the feedback and the previous sketches led us to a dead-end where we were not sure what are we trying to achieve, this seemed like a fresh start where we can work with different type of interaction. Indirect interaction with bodies.

The Visual Presentation of the library. Retrieved from TensorFlow

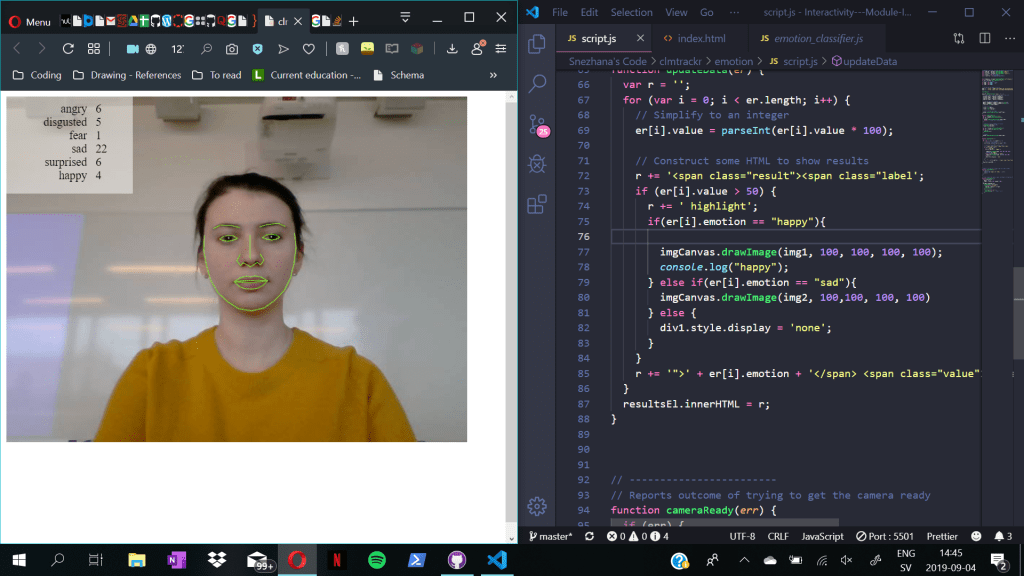
The new example was supposed to detect people when they show up on the camera, and detect their wrist which can be used as a controller. The sketch we created was changing the pixels of the “rgb” spectrum depending on the distance between the wrists. It looked “cool” but it still felt as if we are not on the right track by not knowing what exactly are we working towards.

Reading through the already done code, and figuring out what was the goal of the project felt like very difficult and frustrating since we did not have much time left to create a good sketch. We also asked other students, if someone had better understanding of the topic, but that did not show much result.

Supervision /w Jens

This Thursday we met up with Jens for our coaching session. Since we were okay code -wise with our sketches, we focused more on asking more question about what are we supposed to work towards to. Jens explained to us that we should create an interactive experience in a sense from using the sketch but without the ability to control the system directly and intentionally. It is important to break the link between the directness and the input and output. For example naturally if there is a button and that can be pressed, the expected is to face some kind of output or feedback. He explained that we should try to create something that is not too direct with the interaction and it is harder to understand how the system is being controlled. He also suggested to try and brainstorm again to get some sketches on paper and try to be more creative in non direct interaction.

New sketch and Coaching #2

After our last coaching session, Clint suggested that we should start working on one sketch together as a team instead of separating the tasks and working on individual projects. Since the exploration of few of the sketches were already done, through using GitHub we shared the code between each other and tried on creating a project where both us have work with. That came very useful as we can support each other and use our best abilities while learning together from one another.

The new sketch was based on detecting movement, but on certain place of the screen. Lucie worked on the code for detection, while I was working on making sure it plays the sound when a movement is being identified.

However it will not be an student project if we do not face few challenges while exploring and creating a something new. To begin with the music only played when there is movement within the square and stopped once the person is out of that frame. Since it seemed as very sudden and discontinues interaction, we discussed and decided to add a trigger that will detect that the person has left the frame and there is no movement but would still play music for few seconds afterwards.

With a lots of googling and searching, one possible solution came up! The methods such as setTimeout() was suggested to be used for timer, that will run a certain function once there is motion. However, understanding how to implement this method within our code, and to make it work based on the received data was challenging. Since it was a type of dead – end, but still motivated to find solution we asked for help from Victor. He explained to us how that method works and and what is supposed to be written in order for the code to work.

The code works based on the calculated difference between the pixels of the selected area. If the difference is bigger than 2% we play the song, if not it will be paused after 5 seconds.

Coaching session #2 /w Clint

That day in the afternoon we had coaching session with Clint. We showed him the sketch and presented our idea. One of the things he said about it, was that the sounds can be easily manipulated even though, the initial idea is to be a replacement for a sensor when someone passes by. He suggested for us to try and figure out another way to work with the percentage of the difference. For example, the more movement the faster tempo of the song and so on.

We also shared our concerns about struggling to understand the goal of the project, and that the exploration and the tinkering of the code, feels like it leads to nowhere. As suggestion he thought it would be a smart idea for us to go back to the literature and try rereading it or looking though it in order to understand how to work with faceless interaction fields.

After that me and my teammate had a discussion about what we think faceless interaction filed is and how to incorporate it within the new sketches we were introduced to.

Exploring the sketches (again) and first coaching session

Since the fail of the first sketch, we decided to continue exploring the sketches individually. The next sketch I worked with was detecting the distance between the face and the camera. The rotation factor of the user’s head. It works based on the face points from the library. It’s a different example from the same library as the previous one called clmtrackr.

Retrieved from: github

The distance between the screen and the user is being calculated by getting the highest and the lowest points of the face for the vertical height, and for the horizontal we take the two points that are the furthest apart. In our case that is the 33 and 7 for the vertical distance and the 1 and 13 for the horizontal distance. Then we calculate the middle of both of these distances getting the overall distance from the camera.

That distance is being presented with a line whose size is changing simultaneously with the movement of the face. When the face is farthest away the line is smallest and it increases sizes as we get closer.

I worked on two iterations on this code. The first one was an audio controller based on the rotation factor and the distance of the head. The second one was just adding indicator about the distance and the volume of the song.

For the indicator i decided to reuse code from one of the previous programming courses. It saved me a lot of time and left more space to work with the code instead of writing the same old functions again.

In the first iteration the code controlled the volume of the music and its speed. The speed of the sound-play was controlled based on the head rotation number. The code detect the data gathered from the face points and loops it through a series of if – conditions in order to pick the right speed. In case non of those conditions are true it plays the sound in its normal speed.

The If-statement for the speed of the sound

The next If statement that loops through the gathered data is the volume controller. After the size of the face is calculated it checks between which range it belongs to, the volume its being set accordingly.

The If-statement for the volume of the sound

Coaching Session /w Clint

For the coaching today, we met with Clint in order for him to give us some kind of feedback on the tinkering of the code so far. We presented out sketches and asked questions about the topic more in depth. One of the main conflict for us with this project was the feeling of not knowing exactly what are the sketches supposed to present and do. As a team we were confused of how to approach the subject and to overcome this problem.

His explanation was somewhat helpful. He used practical example of comparing the interaction with the system in the following way:

If there is camera at the corner of the room that detects people present in the room, and we create a system where it reacts based on the number of people wearing blue shirts, it creates in a way indirect interaction. The number of people with blue shirts will control the lightning in the room, but they will not be able to manipulate the system that easily.

Exploring the sketches #1

Re-exam (underlined text is part of the re-exam)

As we were split into groups of two, me and my teammate decided to split the tasks and try out tinkering out different pieces of code to achieve some kind of interaction through the camera. The reason for it was mostly to test out as many sketches as possible, in the exploring stage of the project.

Tinkering

One of the first sketches I started working with, was with the library called clmtrackr. The sketch in particular was based on the emotions of the face that is being registered in the camera. For example if the person is smiling, depending on a certain points that are being set from the library it would be detected and registered in the top left corner.

Visual Presentation of the Sketch

For my tryout to work with the data that the camera is receiving I decided to imput some kind of reaction pictures based on the face of the user. Within the html I created a new div which is going to contain the images that are being added. Then through out the DOM elements I connect the div with the images and their sources.

Then I continued by adding different conditions through out an “if – statements” which detect which emotion is being processed throughout the code. The way it works, is that the library detects the data and it’s number. In case it’s bigger than 50 the emotion is being highlighted, and then through out conditions it’s being checked if the highlighted emotion is a certain string.

If the emotion it is for example “happy” the picture with the text “stay happy” will show up on the screen. Or if the emotion is sad, the canvas will draw a “cheer up” image!

But since this example was mostly based on direct interaction which can be manipulated by the person, we decided not to go through with it.

Module 1 – Faceless Interaction + Computer Vision

In the starting module of this course we were introduced with Faceless Interaction and Computer Vision. The assignment for this module is to explore the fields of interaction presented in the paper by Janlert and Stolterman (2015).

Faceless Interaction

Janlert and Stolterman (2015) define a weak sense of what faceless interaction is. According to them it is “an interaction either devoid of any expressive surface-bound modalities or devoid of any impressive surface-bound modalities (but not lacking both).” For example a keyboard does not present a faceless interaction since we interact with the keys while typing, but if we remove the keys and a speech recognition is added can become a faceless interaction in a weak sense (p. 525).

The focus is mostly based on the interfaces and the way they can be used as. They question the definition of the term interface and what is its role in the world of technology. According to the paper interfaces can be seen in the following 4 thought styles as:

  • Surface of contact between things
  • Boundary of independent things
  • A means of controlling an object
  • Expression and impression

They also introduce a possible fifth thought style that is called as a channel of communication. Although Janlert and Stolterman (2015), don’t take it as a thought style on it’s own, rather than a combination of the other ones, they still believe it might be used as an inspiration in the future.

Computer Vision

“Computer vision is a field of computer science that works on enabling computers to see, identify and process images in the same way that human vision does, and then provide appropriate output.”(technopedia.com).

Since the challenge for this module is to combine the both, we were given few examples of code that work based on Computer Vision that should be used and changed to the point where they allow us to explore one of the Interaction Fields:

  • Ambient/pervasive/ubiquitous computing
  • Indirect Interaction (The interaction is not being directed)
  • Ripple-like response

Reference List
– Janlert, L.-E., & Stolterman, E. (2015). Faceless Interaction—A Conceptual Examination of the Notion of Interface: Past, Present, and Future. Human–Computer Interaction, 30(6), 507–539. https://doi.org/10.1080/07370024.2014.944313

https://www.techopedia.com/definition/32309/computer-vision

Interactivity

As a new start for the second year we start with the course Interactivity! During the course we’ll learn how interactivity can take a shape and how it’s function can be changed with different types of material while interacting with it.

The following blog posts will track the process of creating interaction, in a form of reflecting journal entries.